When it comes to travel photography, finding the perfect photo-spots can be time-consuming. You don’t want to waste your precious time on your trip browsing the internet to find the best places to take pictures. That’s why it’s important to plan ahead and research where and when you want to visit each place you want to photograph.
Researching and planning is a crucial part of travel photography. Spending time ahead of your trip to make a list of each place you wish to visit and planning out exactly what time of day or night you should be there, will allow you to make the most of your time and take the best photographs possible.
Below are some tools that I use, and recommend for finding travel photography spots. As well as information on how and what exactly I use the tool for.
ShotHotSpot
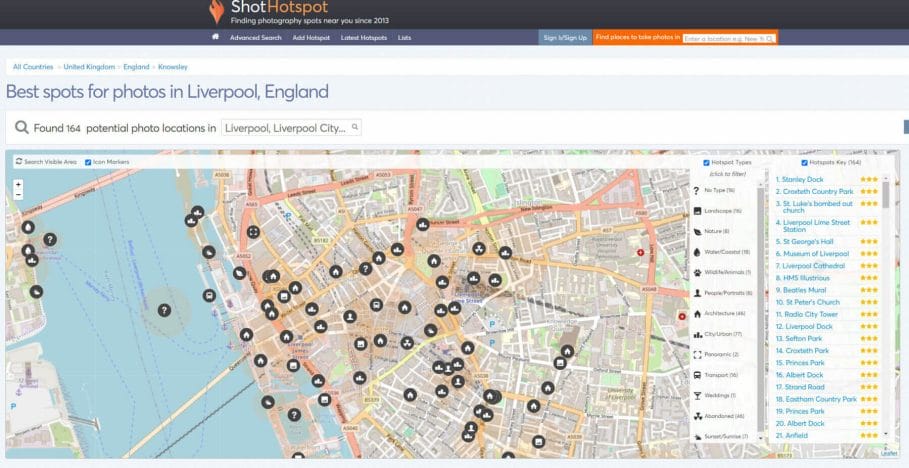
If you’re looking for the best photography spots in a specific area, ShotHotSpot can is a great tool. ShotHotSpot allows you to search for a place to visit, and see a map where photographs were around that area. The map can be filtered by different types of photography spots such as city/urban, wildlife, or transport. Below the map, a list of curated photo locations is generated, with a star ranking next to each spot.
ShotHotSpot gets its data from Flickr and user-submitted photo locations. This does mean sometimes the locations aren’t quite spot on but in general, it’s a really good site for finding places to photograph. Over the years the site has grown and now has a good database of photo spots covering a wide range of photography genres. Such as coastal, cities, wildlife, landscapes, and even abandoned places. So if you’re looking to do URBEX when traveling, ShotHotSpot can be a good tool for helping you plan your urbex photos.
Visit ShotHotSpot to start finding photography locations.
LocationScout
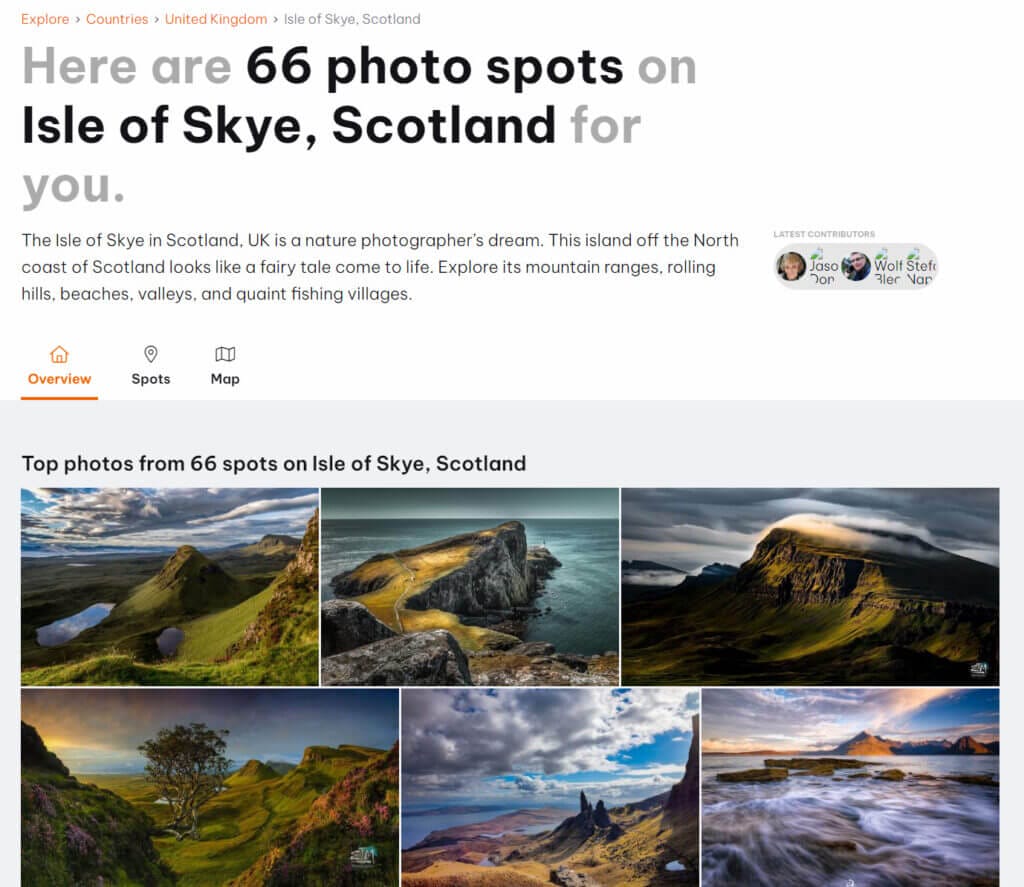
LocationScout is a platform that allows you to search for locations and view photographs and photo-spots. Each photo contains information on the photo, the photographer, and where it was taken. The platform also includes travel information, such as where to park and how far you need to walk. A map shows the photo spot, along with sunrise and sunset directions. Other users can comment and rank the photo-spot.
LocationScout lets you easily search for locations by cities, regions, tourist attractions, or even rivers. The platform offers a wide variety of photo spots in popular destinations like London, Edinburgh, Manchester, Berlin, Chicago, Frankfurt am Main, Tuscany, and Paris.
I recommend registering a free account so you can save photo spots for later. Registering also lets you submit your own locations, and as the community relies on user-submitted data I do recommend returning the favor by posting good photography destinations.
LocationScout has an iOS and Android app that you can download for free. They also offer a premium subscription for their apps that enables features like “Around Me” that lets you search around your current location for the best photo spots. You can also look up photography spots by time, and distance and use the app to navigate to them. They also include a bunch of free photography tutorials so if you want to improve your skills as a travel photographer I recommend checking this app out.
Locationscout is my favourite tool for finding locations. I love the amount of information given for each place, and the travel information gives a rough idea of how accessible the place is.
Visit Locationscout here.
Google Images

Google Images is great for getting a quick overview of what to photograph in an area. You can quickly see the types of photographs taken and get a brief understanding of what to photograph. When you search for a location on Google Images, you’ll get a quick overview of what photos were taken in the area and you could click through to these sites to find out more information.
You’ll also get shown a list of related searches, which normally contains some of the best things to see and places to photograph in your searched destination. Click on one of these suggestions and you’ll get photos specifically of that place.
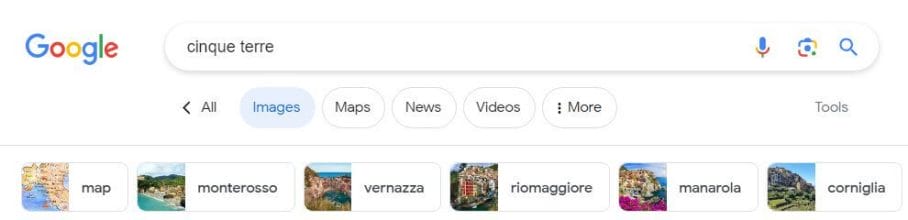
For example, if you look up Cinque Terre in Italy, you’ll get recommendations for some really photogenic locations such as Monterosso and Manarola as shown in the screenshot below. If you click on the location you’ll then get to see more photos of the area.
Google Images is quite a basic tool but it is completely free and it’s good for doing a quick check of the location, to get some ideas for what photo opportunities the area offers before you head off. I recommend combining Google Images with one of the other tools in this list. Use Google Images to do a quick check look at the location and then use one of the other travel photo spot apps to find the exact spots where photos were taken.
Visit Google Images here.
Google Maps
Google Maps is a powerful tool for navigating, finding directions, and discovering nearby spots. However, it is also an excellent resource for viewing photographs of different locations. By browsing the place where you are visiting and clicking on different spots in the area, you can bring up user-submitted photographs. You can also save locations to your maps to easily find them again later on. You can also use it to find different types of places to photograph, e.g. if you want to photograph castles in Snowdonia, type in castles Snowdonia and it’ll show a map of all of the castles in the area.
Google Maps also provides real-time traffic updates, and it has a mobile app that allows you to access the same features on the go. With Google Maps, you can find directions, distances, and routes to any location.
To record locations you wish to visit on Google Maps, either click on the location’s name and then click “Save” under the location’s name on the left.
If the place isn’t named/marked, right-click on the map and select “What’s here?”. A red marker appears, along with coördinates at the bottom of the map. Clicking on the coördinates brings up the save button on the left and an option to add a label.
Access Google Maps here.
Google Earth
You can also use Google Earth to find the best locations for photography. Google Earth is free, and can be downloaded to your phone or computer (both Mac and Windows), or on the web using Chrome. You can use Google Earth in your browser, on the Google Earth website here.
To use Google Earth, start by typing in a search location in the “Search Google Earth” search bar, for example Paris.

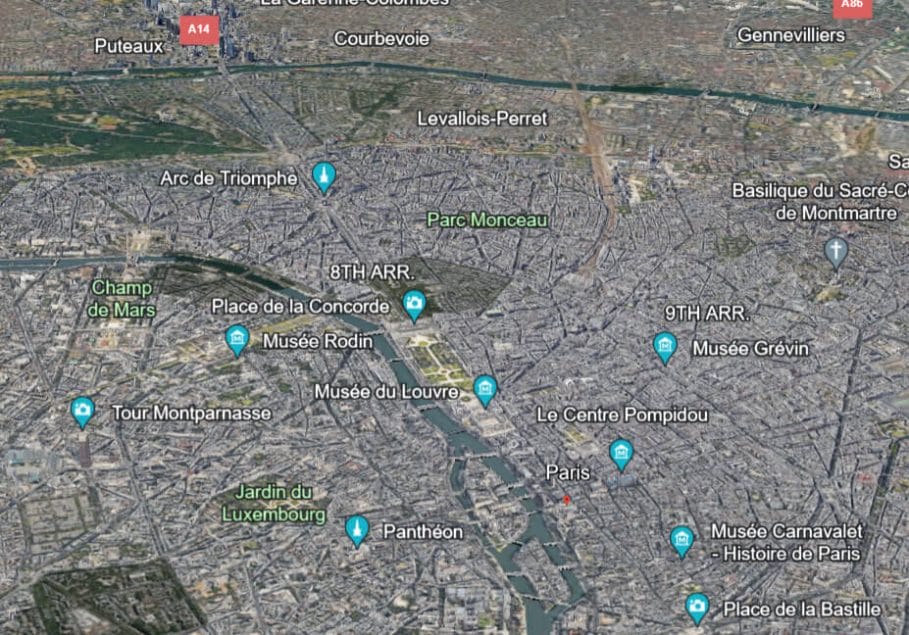
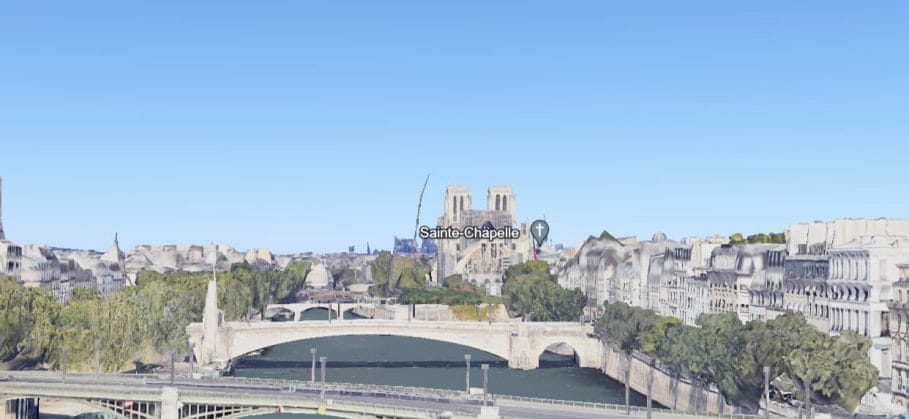
This brings up information on the city and a map of the city. For a better view of the location, click the 3D button. You might need to wait a minute for the information to load on the map. Once loaded, you’ll have an aerial view of the city in 3D with the main attractions labeled like the screenshot below.
To access a better view of the terrain, hold down shift while dragging the mouse. This allows you to view the terrain as in the screenshot below. Drag left to right to pan, or up and down to rotate the view. 3D models will load and give you a good overview of the city, so you can browse around as if you’re already there and find the best spots to take photos.
Google Earth is great for finding popular places to take photos from but you can also use it to find more hidden locations, by virtually walking around the city. For example, I used Google Maps to find the best places to capture photos of the Sky Tree in Tokyo. This let me find some locations that aren’t typically used to photograph the sky tree, as most people overlook them. So Google Earth is great if you want to get find more photography opportunities that offer a unique perspective.
You can save locations on Google Earth, just click on the name of the sight you want to photograph on the map, and information on the location will load. Under that click “Save to project”.
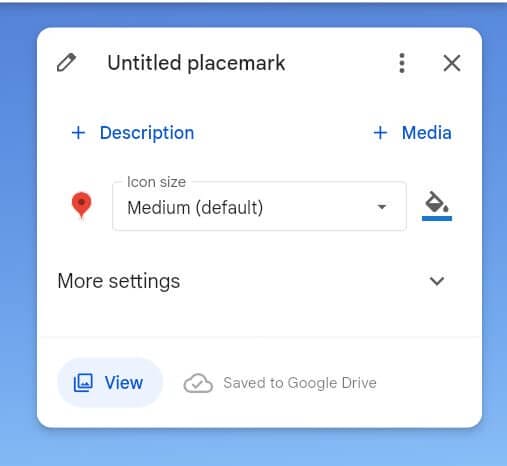
If you want to save co-ordinates, click the map pin icon next to the search bar, and a new window opens saying “App a placemark”.

Click on the map to select the exact place you want to save, you’ll then be asked to either save a file to Google Drive or your computer. Select either of these options, and then you can enter information about the placemark and save it.
Download Google Earth here.
Found this guide useful? Then why not Pin it to Pinterest?

Really helpful thank you for sharing, I’m gonna check out some of these now
super helpful amazing site thanks
super article tyyyyy
Great post – tweeted
Thank you 🙂
Great Information. Worth to Read it. Thanks!!!
Great guide as always Alison, location scout was really useful – found some nice places in the lake district.
I had no idea that the location pic apps/sites existed. What a great idea. Thank you for sharing.