When starting out with photography it is easy to become overwhelmed by the volume of information, range of gear and camera features available. Below is a list of tips that will help any beginner photographer improve their photos.
Tips for Beginner Photographers
1. Photography Gear isn’t always as important as you may think.
Having expensive gear is nice but isn’t always a must. Learn to use the gear you have, before investing in upgrades. You don’t always have to buy the latest and greatest. If you do find that you need a new lens or body, buying second-hand can help save money. Third-party lenses are excellent value for money, some offering better or equal quality as the camera manufacturers.
2. Invest in a good tripod and head early on.
A lot of beginner photographers, start off buying a cheap tripod, as their price point seems appealing. This is why this tip has been included on my list of tips for beginner photographers.
When buying a tripod for photography you can pick two things from the following: cheap, sturdy, lightweight. A tripod must be sturdy to support your equipment. Cheap tripods are normally heavy or unstable, sometimes both. The last thing you need is your camera shaking because the tripod can’t withstand the wind, or worse – the tripod falling over. A good tripod will last you years, and investing in a good one early on will save you money in the long run.
3. Check out other photographers work.
Looking at other photographers work can help you further understand photography. Find some photographers whose work you like to follow on a site such as Flickr, or Instagram. Think about why you like them but also why you don’t. What do you think they could have done better? Also think about, how they compose images, their style, the lighting, the settings used.
4. Experiment with different photography techniques
Experimenting with photography is fun and a great way to learn how to use your camera. Experiment with your camera’s settings, and see how they change the image. Experiment with different types of photography. If you can, I recommend doing some tabletop photography at home. This is a great way to learn to see and control lightning, and how it impacts the image. You can use natural light, to begin with, and later invest in some cheap tabletop lights.
5. Learn the basic guidelines/rules.
Learn basic types of composition such as the rule of thirds, read up on basic techniques for different types of photography that you’re interested in. But remember that any rules in photography are more of a guideline and are not set in stone. Over time you’ll learn when going against the rules/guidelines can help create a stronger photograph.
6. Look for any distracting elements.
Look out for any distracting elements and try to remove them before taking the photograph. Is there an unwanted street light? A person stood on the edge? If you move a bit you may find you can remove these before taking the photo which saves cropping or cloning later on.
7. Avoid accidentally cutting part of the subject off
Make sure that the entire subject is in the frame, or if you do want to cut part of it out, it should look intended. Have you accidentally cut the top of a building off? What about someone’s feet or an animal’s tail?
8. Take 3 photographs of everything.
Taking multiple photographs of the same subject from different angles, heights, sides, different compositions, changing camera settings etc can help you develop an eye for photography.
You will learn what you prefer for certain subjects, what works and what doesn’t. Take a minimum of 3 different photographs of each subject, and you’ll soon start noticing improvements.
9. Join an online community or local group that is beginner-friendly.
Hanging out with other photographers can help you develop further. Whether it’s online or in-person, it can help motivate you to get out more and learn. Just make sure that any group you join is beginner-friendly, as a lot are competitive and it may seem quite daunting at first.
Find a local group by googling “camera club” and your area. Facebook is excellent for photography groups but does not dismiss forums as there are plenty still going
10. Get out and take photographs regularly.
Last of all, and what I think is the most important tip – practice, practice, practice. Get out with your camera and take photographs regularly. After you have been out shooting, transfer the photographs onto a computer and see which ones you liked, and have a think about why you like them. What worked? What could you change? Then go out and practice more, taking into consideration what you think you could improve on from your previous set of photos.
If you’re looking for places to visit, read my photography guide on finding photo spots.
11. Learn what shutter speed is and how to control it
Shutter speed refers to the length of time the camera shutter is open.
The longer your camera’s shutter stays open, the more light gets recorded in each frame. So scenes with high amounts of light are often best captured at faster speeds, while scenes with low amounts of light may need longer shutter speeds to get everything correctly exposed.
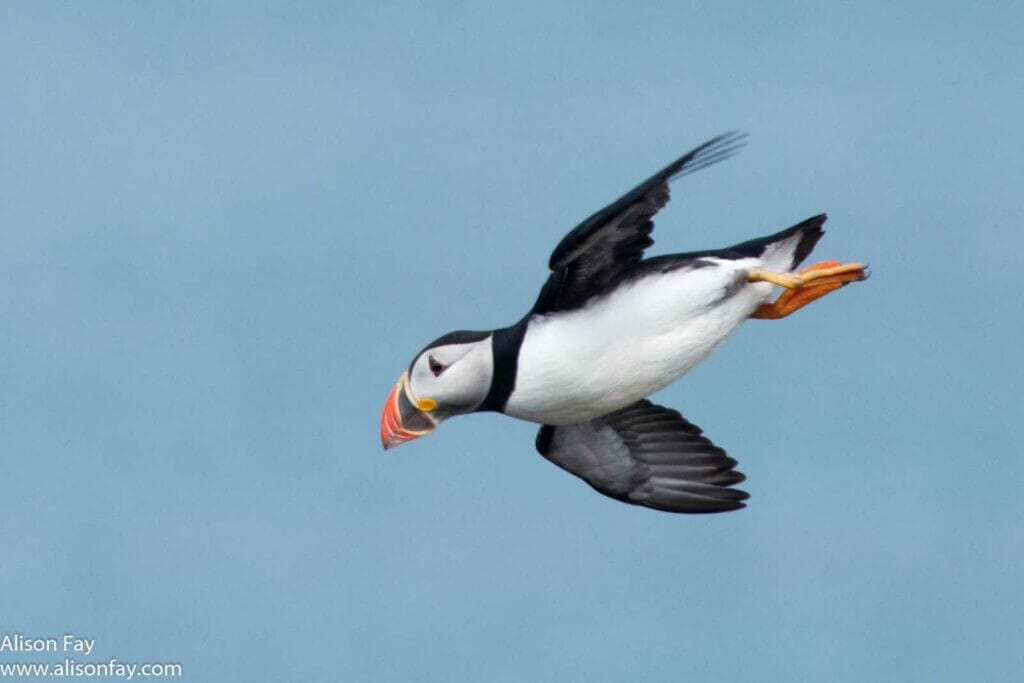
If you’re capturing a moving subject such as the puffin in the photograph above, you’ll want to set your camera to use a higher shutter speed to freeze it or a slower shutter speed if you want to show the movement. Faster shutter speeds are normally used for sports and wildlife photography, to freeze people or animals. While slower shutter speeds are useful for landscape photos when you want to make water into a milky effect.
12. Learn what Aperture is and how to control it.
Aperture refers to how wide or narrow an opening is in your lens—the wider it is, the more light gets through.
Aperture values are listed as f-stops—for example, f/4 or f/5.6. F-stops control two things: Depth of field and how much light gets to your camera’s sensor. The larger the number, the smaller the aperture and the smaller the number, the larger the aperture.
Think of your lens’s aperture like pupil size: when it’s smaller, less light comes into your eye; when it’s larger, more light enters.
Small apertures, such as f22 will create a larger depth of field, allowing more of your photograph to be in focus. It also reduces the amount of light entering the camera. If you’re doing close up or macro photography you’ll normally want to use a large aperture to capture as much detail as possible. If you’re taking landscape photos, you’ll normally want to use a somewhat large aperture, around f8 to f16 as this will help reduce the amount of light entering the camera, and ensure everything is in focus.
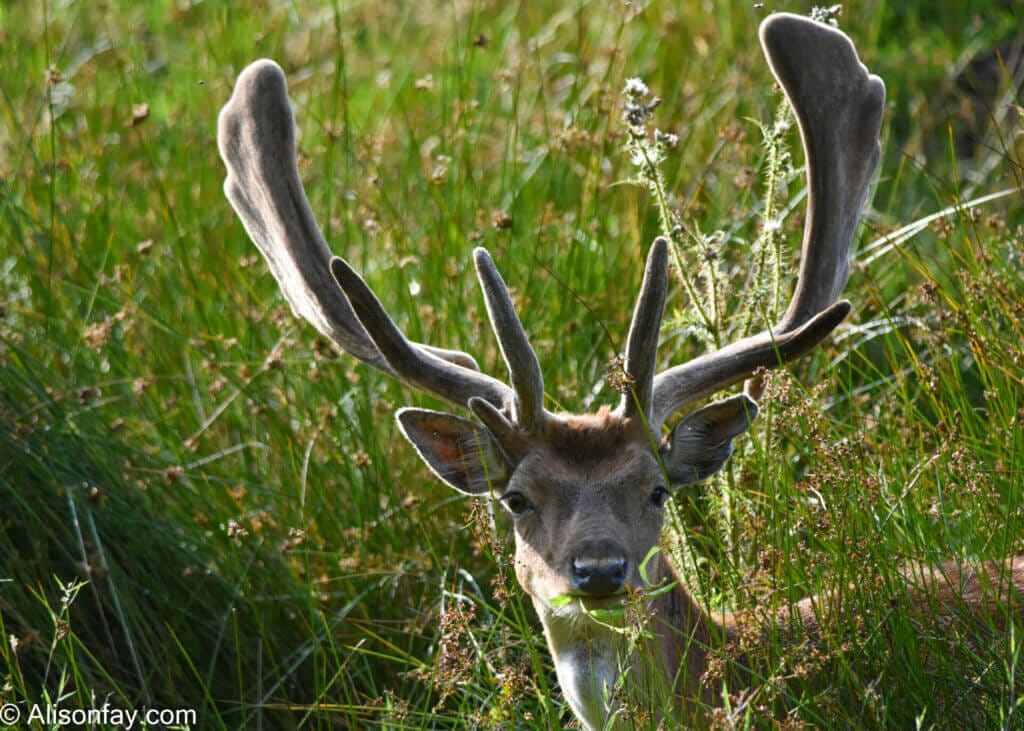
Large apertures, such as f1.8, create a small depth of field. This reduces how much of your photograph is in focus, but increases the amount of light entering the camera. This can be useful for portrait photography, and when you wish to separate your subject from the background. For example, in the photo below you’d use a large aperture to create a separation between your subject and the background, and end up with a blurry background.

13. Start increasing (or decreasing) your ISO
If you’re looking to take great photos and aren’t happy with what you’re seeing, it might be time to change your ISO setting. ISO refers to how sensitive your camera is to light—the higher the number, the more sensitive it is.
For example, if you set your ISO at 400, you can take photos in lower-light situations than if you had set it at 200 or even 100. However, a higher ISO also means that less light gets into your camera sensor and thus your images won’t look as crisp and clear as they could be.
Start experimenting with different ISOs, and combine this with different shutter speeds and apertures to learn how to control the light getting to your camera’s sensor and create different types of photos.
You may find that shooting on a higher ISO makes it easier to capture movement with fewer blurry details. Or maybe lowering your ISO will make it easier to eliminate noise from an image taken in bright sunlight.
14. Start shooting in RAW instead of JPG
Most cameras today shoot in RAW (digital) or JPG format.
JPGs are great for sharing on social media and emailing to friends, but if you want to do anything beyond minor photo editing such as cropping your photos or adjusting your camera’s white balance, then you need to shoot in RAW. RAW stores much more information than a JPG, so you can make more extensive edits to the settings of your photo by pulling out more detail from the underexposed areas.
Most professional photographers use RAW because it allows them to save a lot of digital information, meaning that when they edit their photos, they can get a much larger range of colour and contrast without a significant loss in quality. The only downside is that it takes up more storage space on your device and normally requires specific software such as Adobe Lightroom or Adobe Elements to edit them.
I do recommend shooting RAW in most situations possible, but if you’re using a smartphone, you’ll need to check if it has the ability to do so and if you have enough space. If you’re running out of room and don’t see yourself doing any major photo editing anytime soon, then go ahead and use JPGs; they’ll still look nice on your phone’s display!
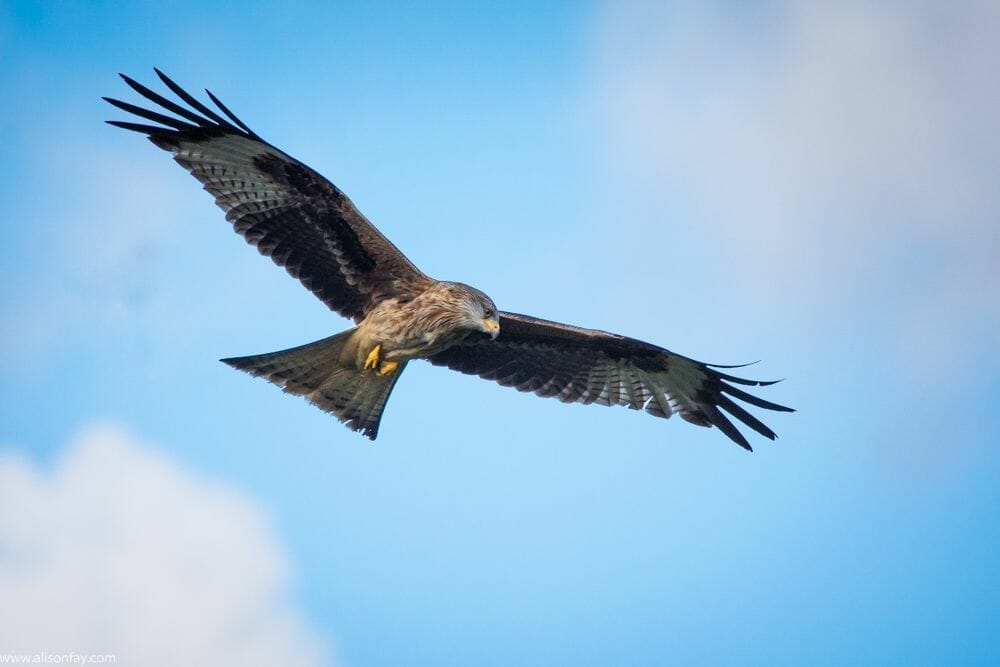
There are some occasions I prefer to shoot JPG instead of RAW. For example, when I’m photographing wildlife I normally use JPG as this allows my camera to process the images faster, without any downtime – so I can use the burst shooting modes continuously. Shooting on RAW when photographing animals has caused my camera to buffer (stop shooting to process the images) and in turn that has cost me the shot I wanted. The photograph below was taken in JPG, rather than RAW so that I could take hundreds of photos before my camera needed to buffer.
Found this guide helpful? Then why not check out my guide to photographing waterfalls in Iceland.
For more photography tips, check out Suitcase and Wanderlust’s 7 quick tips to learn photography.
If you found this useful, then please share it on Pinterest.


Help tips thanks